If you’re using Midjourney, you might know the struggle of creating consistent characters.
But here’s the Good News!! Midjourney has finally released the most anticipated feature called Character Reference.
Midjourney’s new Character Reference feature allows users to create consistent characters without distortions by matching a reference image, similar to the Style Reference feature but focusing on character likeness instead of style.
So, we have tried the Character Reference and generated a lot of consistent images with Midjourney. Excited to learn how to create consistent images in Midjourney?
Let’s get started!
What’s The Latest Character Reference Feature in Midjourney
The Character Reference feature works similarly to the existing Style Reference feature, but instead of focusing on matching a particular artistic style, it prioritizes the character’s appearance.
By uploading a reference image and using the --cref URL command followed by the image URL, you can guide Midjourney to generate characters that closely resemble the provided reference.
You can adjust the strength of the reference using the --cw command, with values ranging from 0 to 100. At the default strength of 100, Midjourney will consider the character’s face, hair, and clothing when generating the image.
Check out this image below. See how consistent this is from every angle?
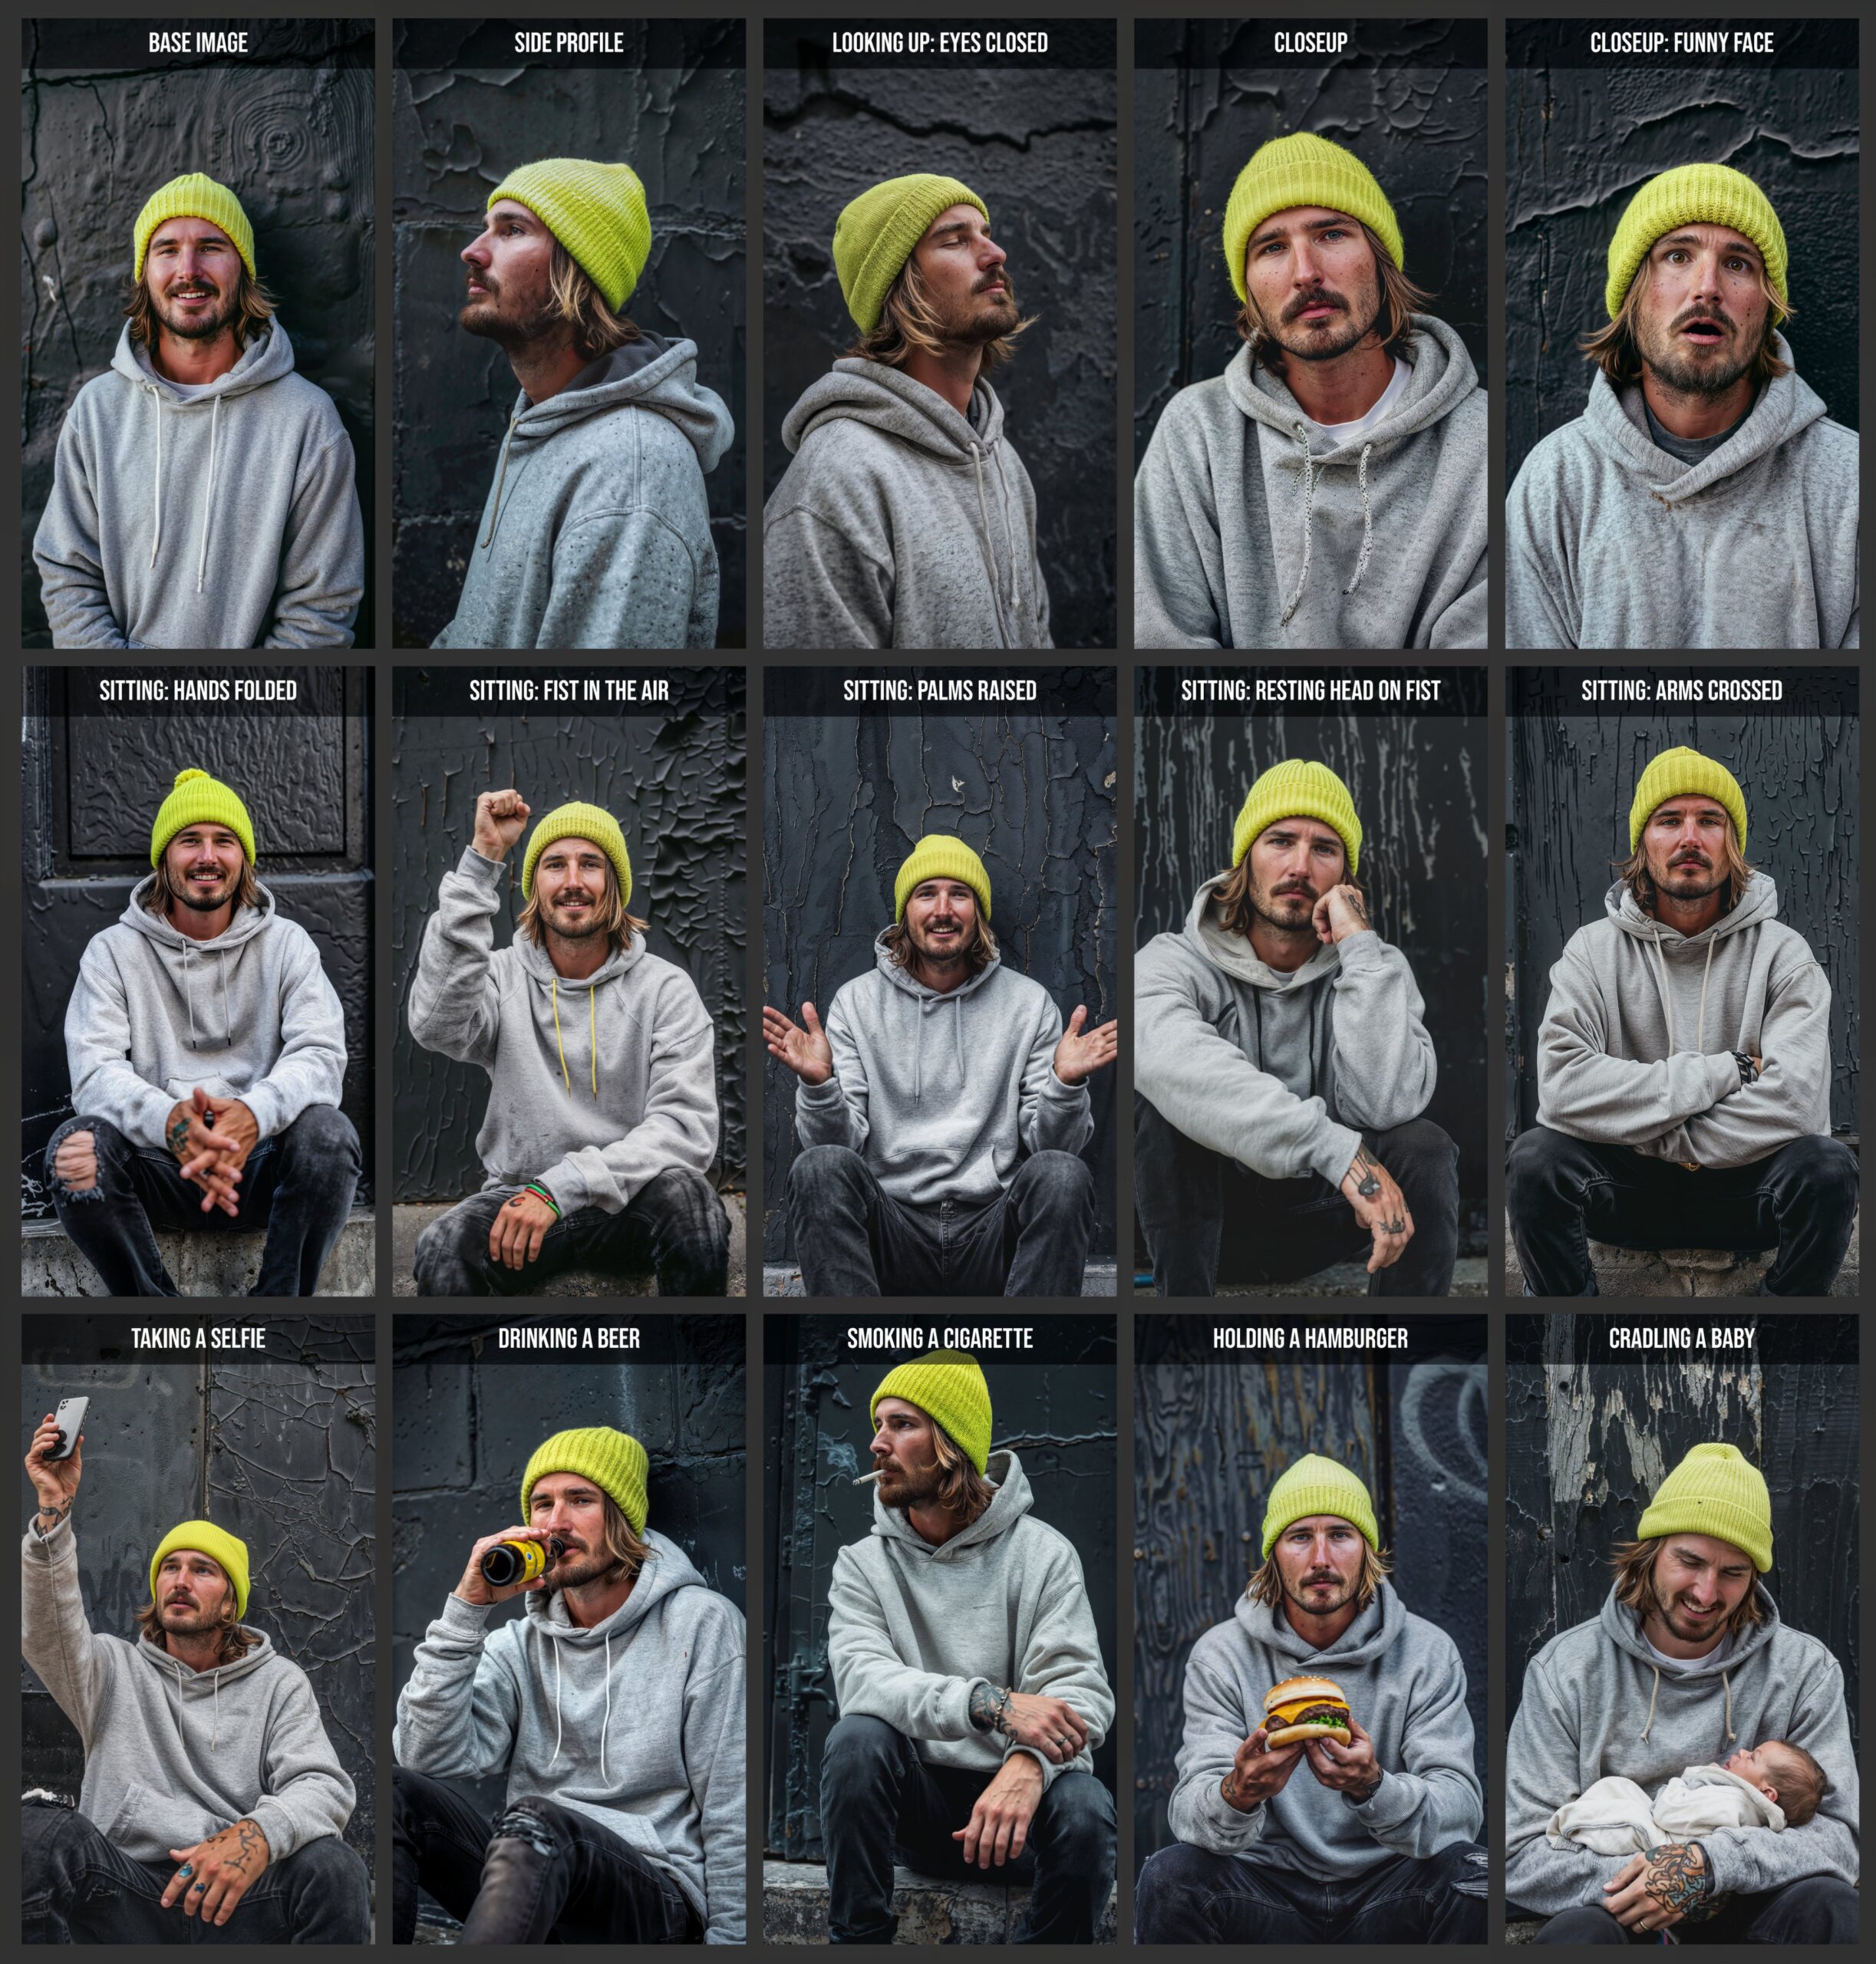
Prompt Used👇

Base Prompt:

Photo type: street photography portrait, extreme closeup, subject: 30 year old man, jubilant expression, tan skin, dirty blonde hair, beard stubble, wearing: grey acid washed oversized hoodie, lime green beanie, subject focus: sharp focus, environment: set against a black concrete wall, texture: artfully cracked concrete, image type: 35mm --ar 9:16

CREF Prompt:

Photo type: street photography portrait, closeup, subject: 30 year old man, sitting on a curb, comfortable pose, extending his arm upwards, taking a selfie with an iphone, looking upwards at the phone, dirty blonde hair, beard stubble, wearing: grey acid washed oversized hoodie, black jeans, lime green beanie, subject focus: sharp focus, mid ground, environment: set against a black concrete wall, texture: artfully cracked concrete, image type: 35mm --ar 9:16 --cref {image link} --cw 90
The best part is if you’re a pro user, you can take the Character Reference feature even further by blending information from multiple images.
By providing multiple URLs separated by spaces after the --cref command, you can create unique character combinations, similar to using multiple image or style prompts.
But why this feature is so exciting? Here are some of the reasons that we think make Midjourney a much better alternative now compared to other AI image generators:
As we have covered what the Character Reference feature is and what it can do, let’s now see a step-by-step process on how you can create consistent character images with Midjourney.
How To Create Consistent Characters in Midjourney
Now, just follow the below steps to easily create consistent characters, AI influencers, and more using the Character Reference feature in Midjourney:
Step 1: Create a Base Image in Midjourney
First, as Midjourney announcement documentation suggests “This feature works best when using characters made from Midjourney images. It’s not designed for real people” our first step is to create a base image.
Let’s create one using this prompt:
/Imageine prompt: Capture a highly realistic portrait of young spanish american women in a garden, aged 27 years old, showcasing graceful and beautiful features, the subject should be captured with [happy emotions], in the style reminiscent of Elliott Erwitt, Emphasize details like clothes, real skin, eye color, eye contact, using a [14mm] lens, ensuring a [happy cheerful] mood with [soft lighting style], with color grading akin to [vibrant], --no watermark, deformed iris, deformed pupils, semi-realistic, cgi, 3d, render, sketch, cartoon, drawing, anime, digital art, text, cropped, out of frame, worst quality, low quality, blur, two hands, plastic, fake, uncanny valley, disfigured, deformed, bad anatomy, --stylize 1000 --ar 3:4 --v 6.0
This prompt generated the base image given below that we’ll use as a reference to create consistent character variations:

Step 2: Using Character Reference Parameter
To use your character consistently in Midjourney, start by copying the URL of your character’s base image. If you don’t know how to use reference image in Midjourney, check this guide.
Then, write a new prompt for the character and add --cref followed by the image URL at the end of your prompt.
If you want to control how much Midjourney should match the features of your base character image, you can optionally use --cw (character weight) and a value between 0-100. A higher value (e.g., --cw 100) will closely match the features, while a lower value (e.g., --cw 0) will allow for more variation, such as changing hair color or clothes.
Here’s an example of how your prompt might look:
[Your Prompt] --cref [Image URL] --cw [0-100]
For example, here’s the prompt we used to generate a completely different scene for our character while keeping their appearance consistent:
/imagine prompt highly realistic portrait of young spanish american women reading a book by a cozy fireplace, in the style reminiscent of Elliott Erwitt, Emphasize details like clothes, real skin, eye color, eye contact, using a [14mm] lens, --cref https://s.mj.run/0_Gs4amOysc --cw 100 --v 6.0
Here’s the output generated by Midjourney:
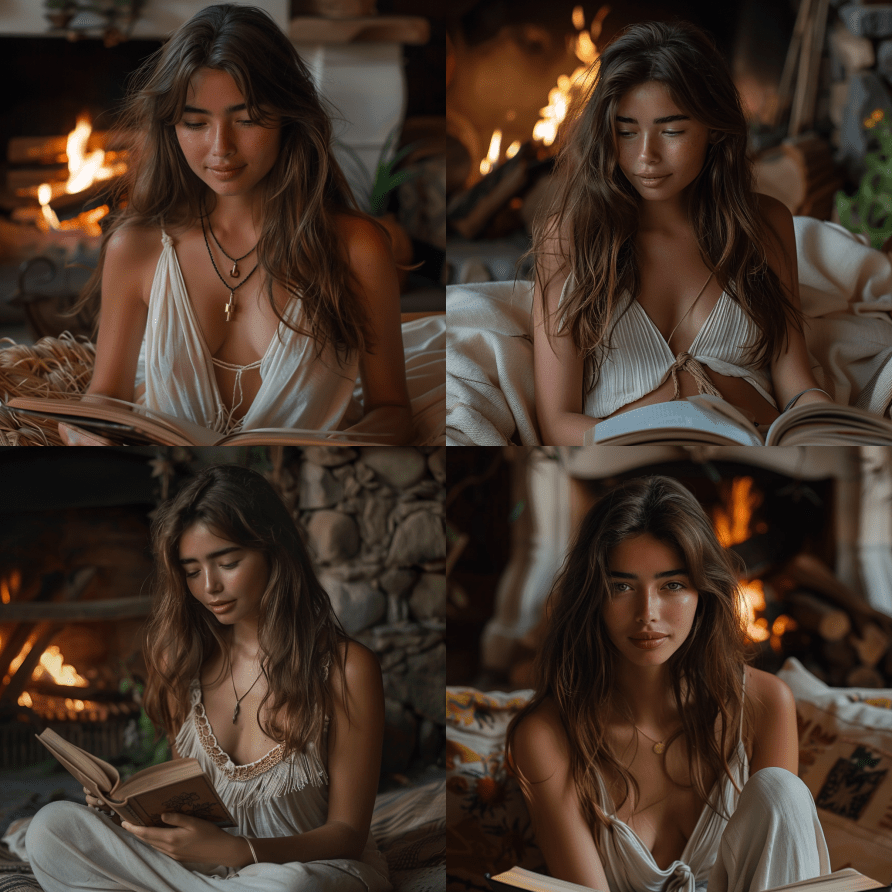
And that’s it. Using the above parameters you can easily use this latest Character reference feature in Midjourney to create consistent characters.
Though this feature will help you generate very consistent characters, it’s important to note that it’s still in beta. So, the precision of this feature is limited, as it won’t copy exact dimples, freckles, cheeks, or t-shirt logos.
Next, Play with The Character Weight Parameter
The character weight parameter (--cw) in Midjourney allows you to control the strength of the character reference image’s influence on the generated output.
Despite its name, “weight” doesn’t refer to the character’s physical weight; instead, it determines how closely the generated image should match the reference image.
By default, if you don’t specify a character weight, Midjourney will use the maximum strength of 100.
At –cw 100, the AI tries to capture and reproduce as many details from the reference image as possible, including specific clothing items like the dress of our reference image in the previous examples.
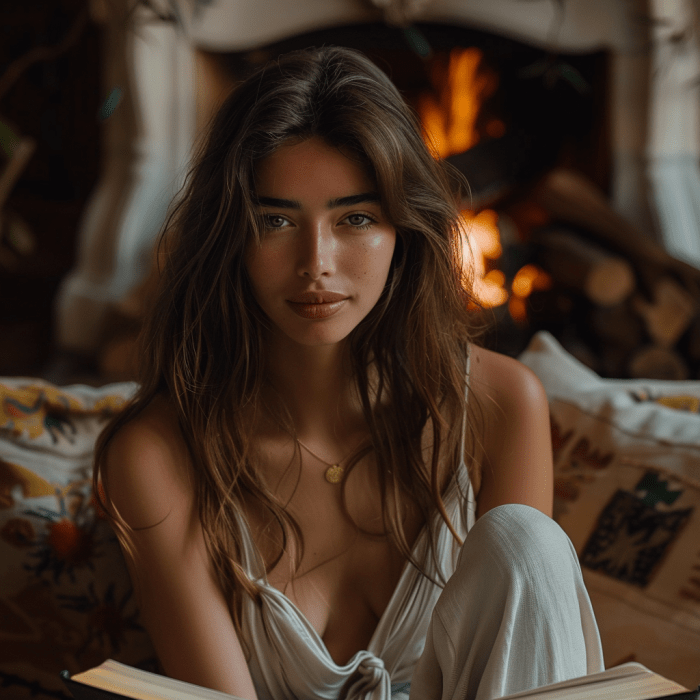
On the other hand, when you set the character weight to 0 (--cw 0), Midjourney primarily focuses on the character’s face, giving you more flexibility to change other aspects like clothes and hairstyles.
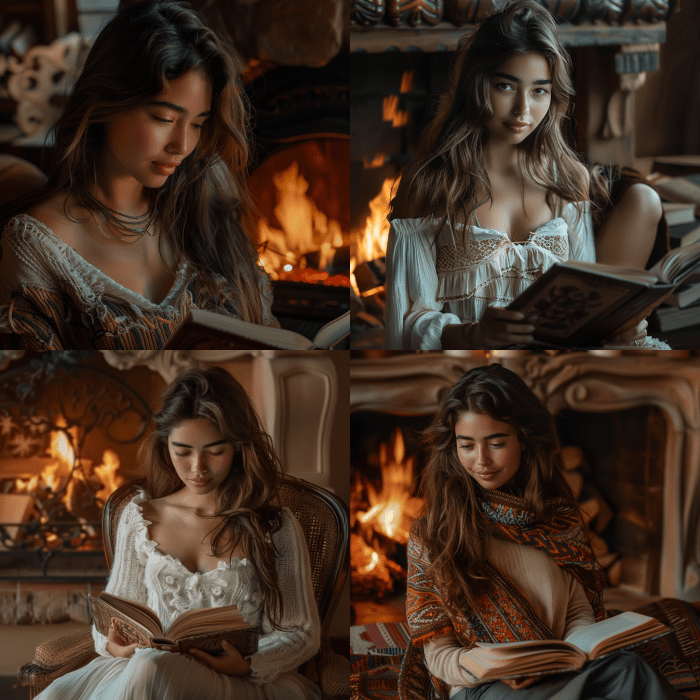
To better understand how the character weight affects the generated images, let’s experiment with different values: 80, 40, 25, and 10.
As we decrease the character’s weight, we’ll observe how the generated images gradually deviate from the reference image regarding clothing and other details while still preserving the character’s facial features.
Changing Character Weight
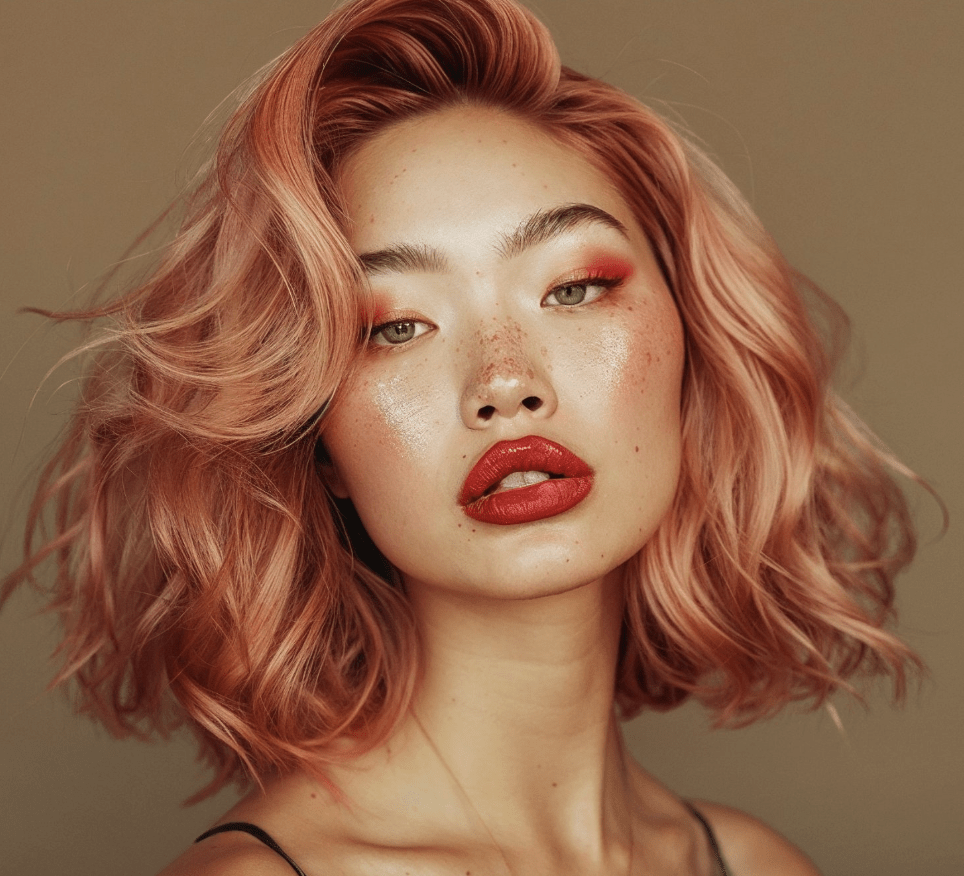
For this example, we will take the below reference image of an Asian women to see more clearly how Midjourney preserves features.
New Base Image:
Now, let’s change the character weight to 80 (--cw 80) and see what we get:
/imagine prompt a person making pasta in the kitchen on a beautiful sunday morning --cref https://s.mj.run/5M4lDMWMkPw --cw 80 --v 6.0
Output:
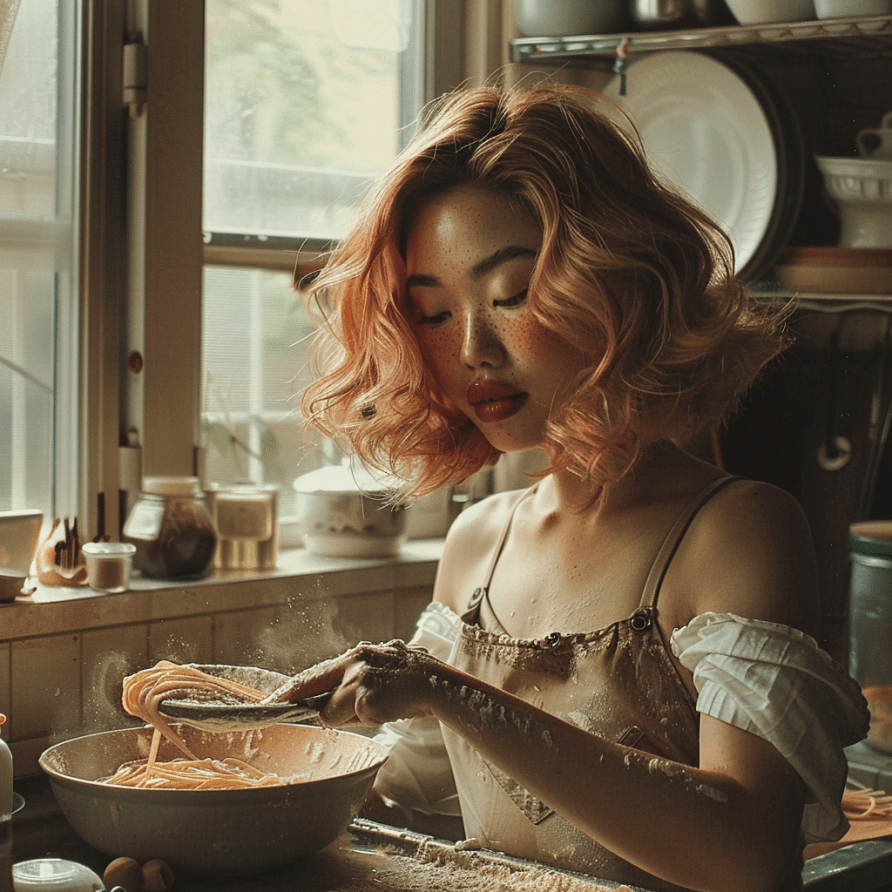
Now, in the above image, it is noticeable that the outfit has changed; the hair color is a bit dull, and the freckles are more prominent.
Let’s change the character weight to 40 (--cw 40):
/imagine prompt a person making pasta in the kitchen on a beautiful sunday morning --cref https://s.mj.run/5M4lDMWMkPw --cw 40 --v 6.0
Output:
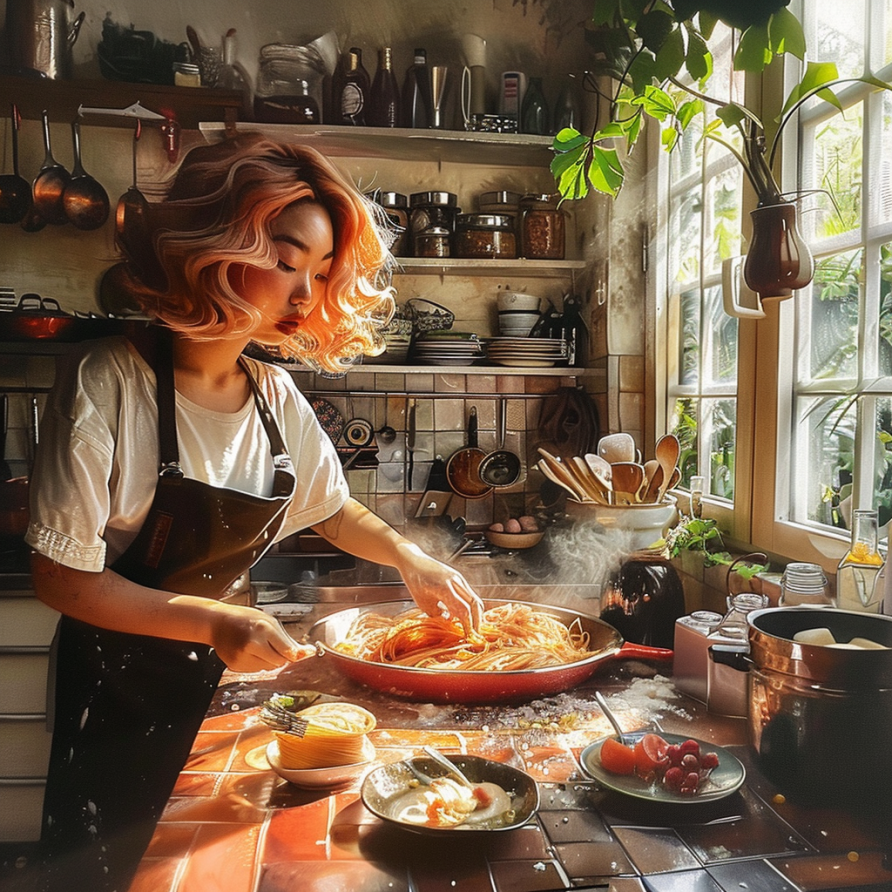
Using the character weight of 40 in the above image removed the freckles, yet it kept other important features from our reference image.
Let’s change the character weight to 25 (--cw 25):
/imagine prompt a person making pasta in the kitchen on a beautiful sunday morning --cref https://s.mj.run/5M4lDMWMkPw --cw 25 --v 6.0
Output:

Now, when using a character weight of 25, we have lost more features, and even the hair colors are changed. This means with low character weight or –cw, you can focus only on face features and keep them consistent rather than the whole character.
Finally, let’s try with the character weight to 10 (--cw 10):
/imagine prompt a person making pasta in the kitchen on a beautiful sunday morning --cref https://s.mj.run/5M4lDMWMkPw --cw 10 --v 6.0
Output:

Well, using a character weight of 10 is interesting. We gained some hair color and other facial features from our reference image. As we said, it’s a hit-and-miss as Character Reference is still under testing.
Using Multiple Character Reference Images in Midjourney
Multiple --cref URLs can be used in a single prompt to strengthen your character’s desired characteristics.
Add a space between each URL, using the –cref tag only once.
Here’s how you can give multiple character reference images:
Template: [Prompt] --cref [URL1] [URL2] --cw 0-100
For example, let’s use two base images and see what happens. For this example, we will use these two base images and generate a much better character:


Let’s add the prompt and see what happens.
/imagine prompt a girl wearing cat iron man costume with iron helmet open --cref https://s.mj.run/5M4lDMWMkPw https://s.mj.run/EDdsCskzhdQ --cw 100 --v 6.0
Output:
This gives us a much better output as our more reference images increase the chance of getting more consistent images.
You can even use this technique with Niji 6 too. Remember, Cref is not compatible with Niji 5 or below.
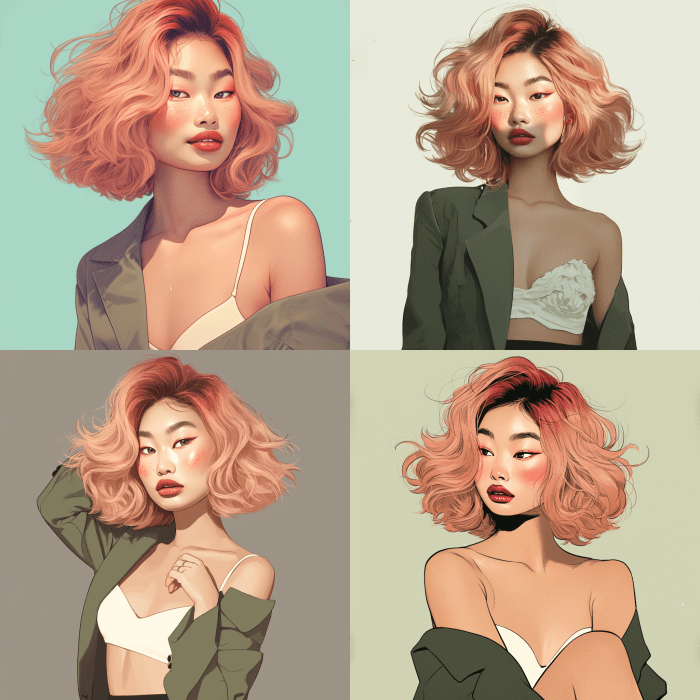
Using Stylize with Character Reference (Advanced)
Using Character Reference (cref) and Style Reference (sref) together is a powerful combination that can significantly alter your character’s appearance.
By applying a style reference, you can change the character’s color palette, clothing style, and overall aesthetic while maintaining their consistent facial features.
For example, using a Victorian-era style reference image can transform your character into a period-appropriate version of themselves, with historically accurate clothing and colors. This technique allows for creative exploration and adds versatility to your character designs.
Let us explain this with an example.
Take the same base image that we used earlier. Now, what if you want to apply a Charles Burton Barber style to that image like below?
Charles Burton Barber style:

You can do that using this prompt template:
Template: [Prompt] --cref [URL] --sref [style URL] — cw 100
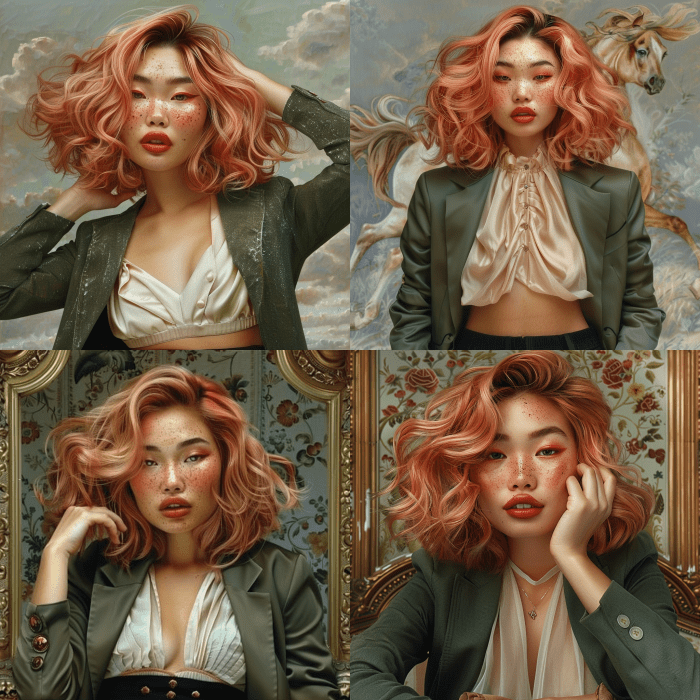
Using the above prompt, we will be able to generate an image like the one below:
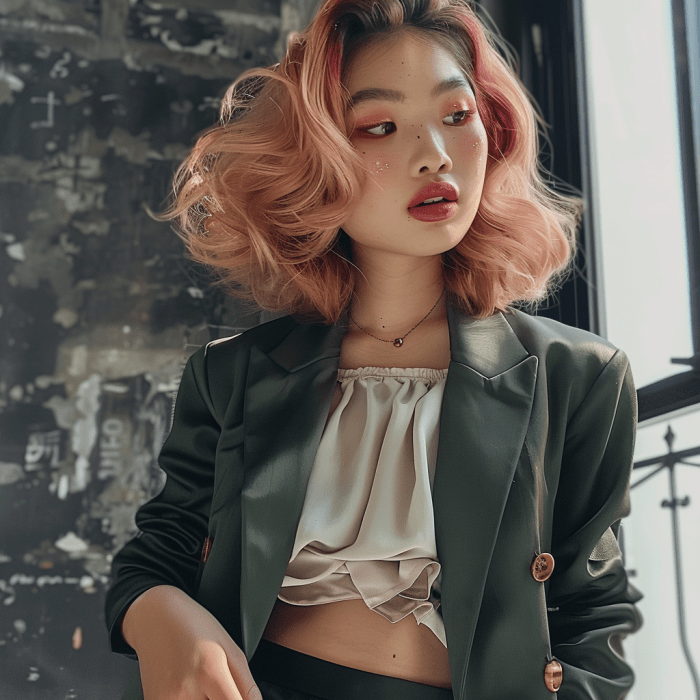
/imagine prompt a girl wearing a dark green blazer white blouse and black skirt, --cref https://s.mj.run/5M4lDMWMkPw --sref https://s.mj.run/lEOGZt590-Y --cw 100 --v 6.0
Output:
That’s The End!
And there you have it!
Midjourney’s Character Reference feature is an incredibly powerful tool that allows you to create consistent characters across multiple images while exploring variations and styles.
So, what are you waiting for? Go to Midjourney and start experimenting with the Character Reference feature today!
Don’t forget to check out our other blog posts for more tips, and tricks:

